
By Krista Halling DVM DACVS
Ever wonder how to get your dog to enjoy riding in a rear-rack bikepacking dog basket? You’re not alone. Teaching your dog to feel safe and relaxed on a bike takes a bit of planning and patience—but it’s absolutely doable with a few simple steps.
This guide walks you through how I trained my 10kg mini goldendoodle, River, to ride confidently in a rear-mounted bike basket. No shortcuts, no force—just a thoughtful setup and patient trust-building.
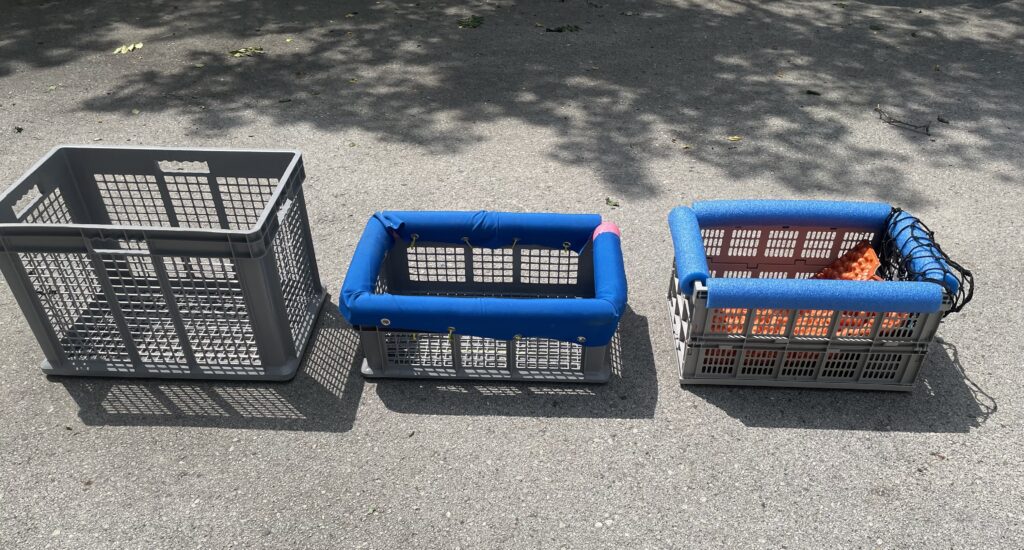
Step 1: Choosing the Right Dog Bike Basket
I chose a basket that’s:
- The right size for my dog to lie down in snugly
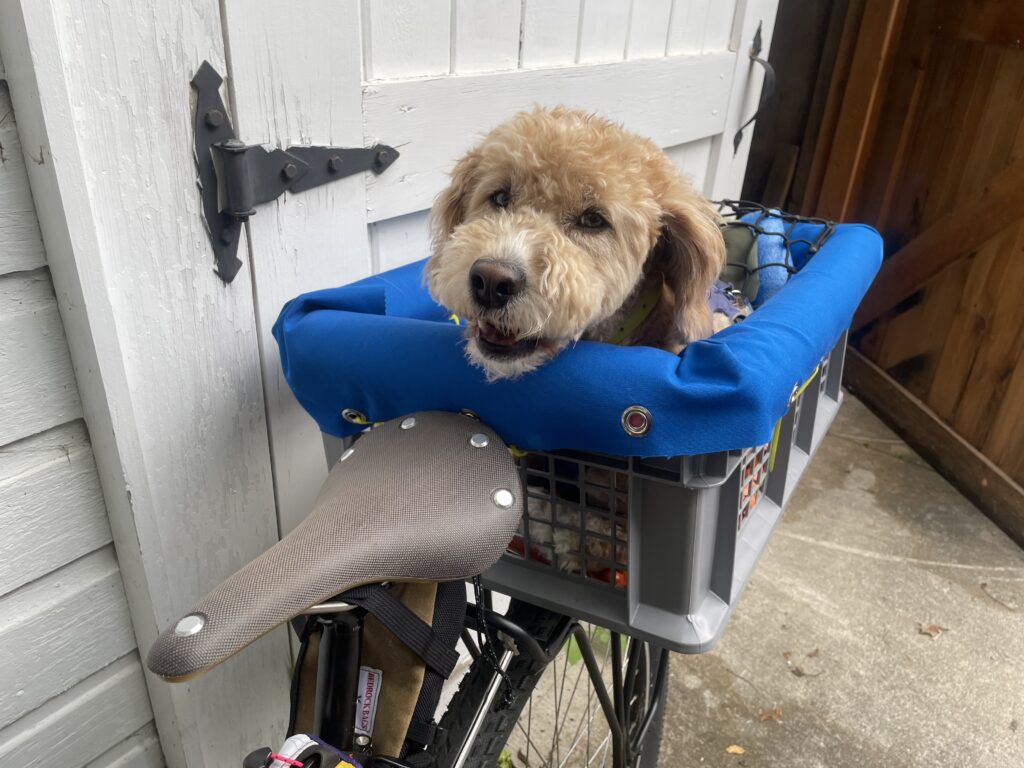
- Stable and secure when mounted to my bike’s rear rack
- Deep enough (8-10″) to prevent her from falling out
- Shallow enough to allow her to easily jump in and out of on command
- Collapsible (since we travel by airplane a lot)
- Below the maximum weight limit (including weight of dog) of the bike rack
Top tip: Dogs feel secure and are safer when the fit is snug and they aren’t not sliding around. Too much wiggle room in their dog bike basket can lead to stress or imbalance.
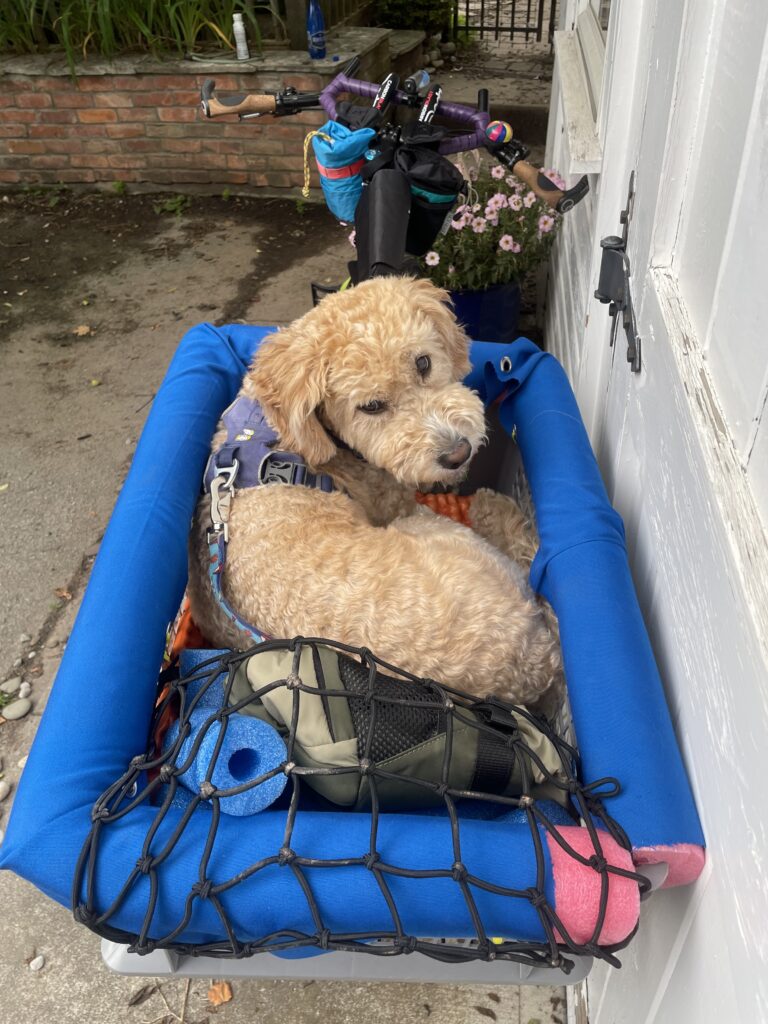
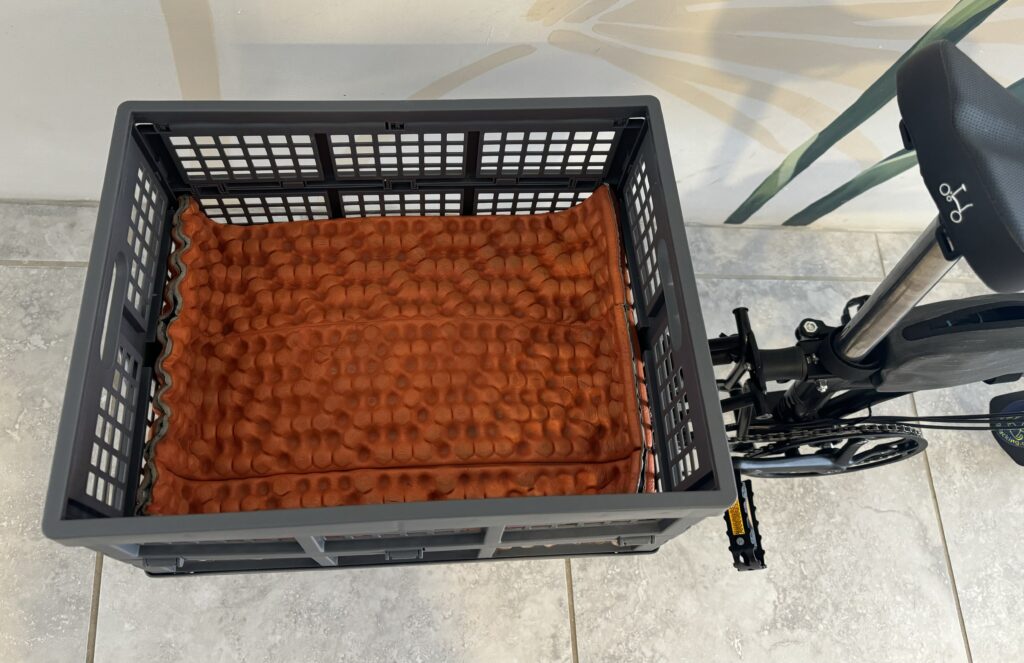
Step 2: Adding Generous Padding
I use firm closed-cell foam to cushion the bottom and sides. Padding is essential and helps with:
- Shock absorption
- Preventing pressure points
- Providing traction when jumping in or out
- Making the basket feel cozy and secure
- Regulate the depth so it’s “just right” to comfortably lie in and rest their head on the rim
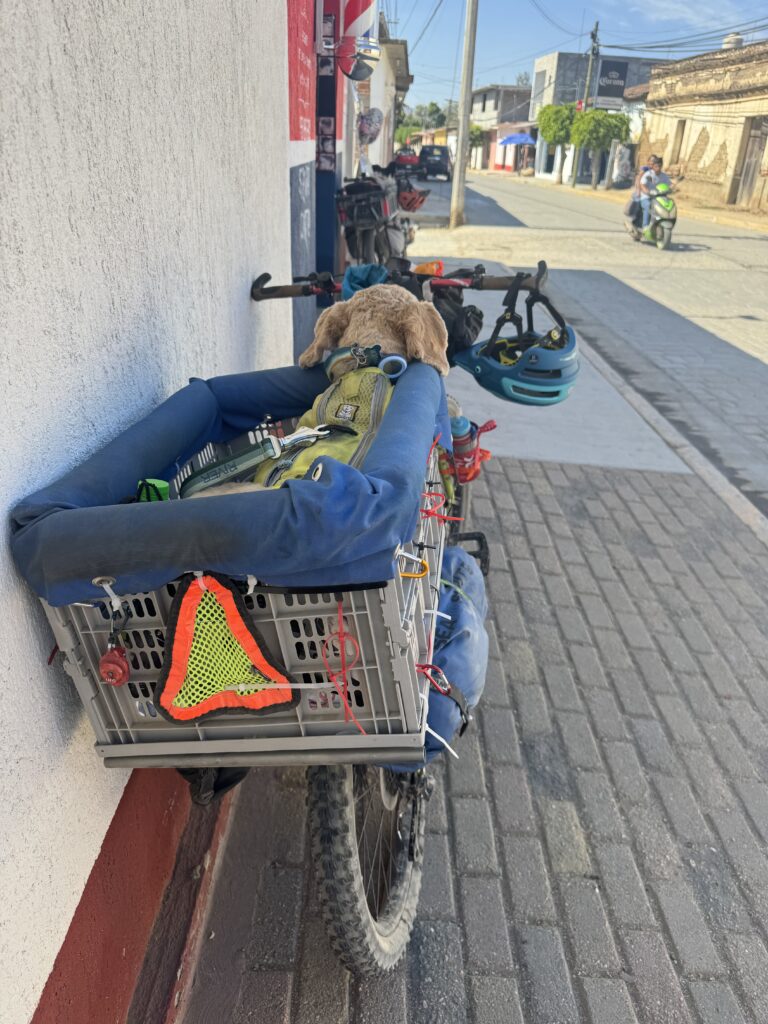
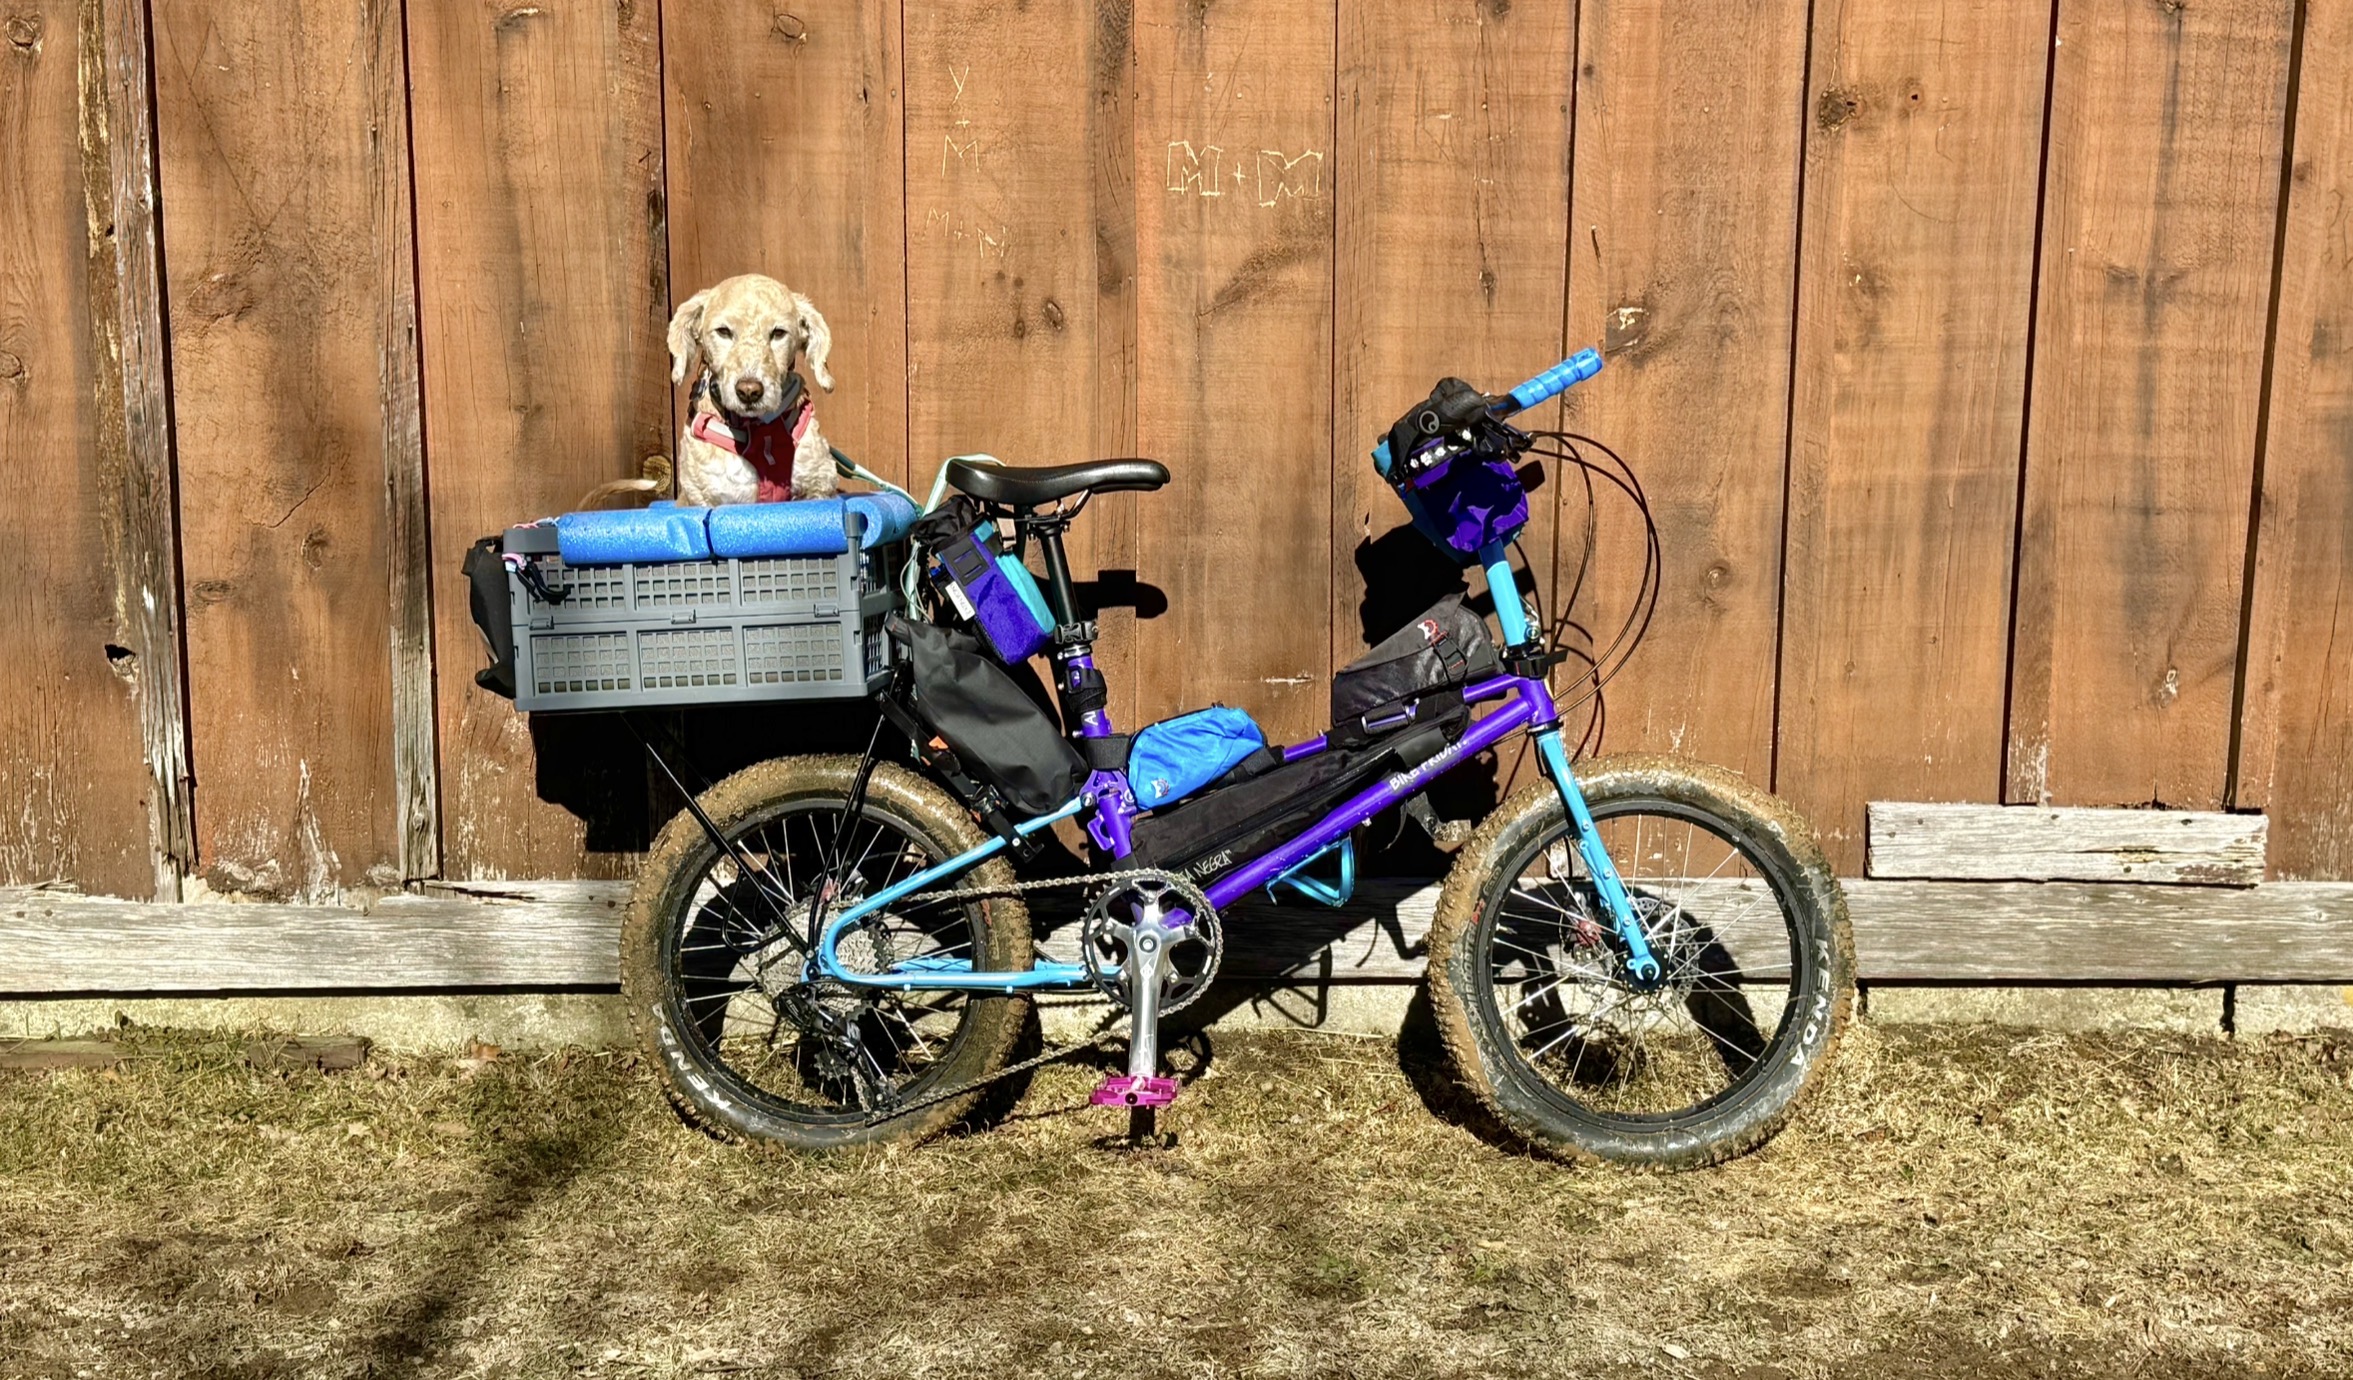
I now pad the interior sides as well as the bottom. A couple of sleeping pads work well for the bottom and sides of the basket; I cut them to be as wide as the basket is long and keep them long enough for River to lay down on them when unfolded.
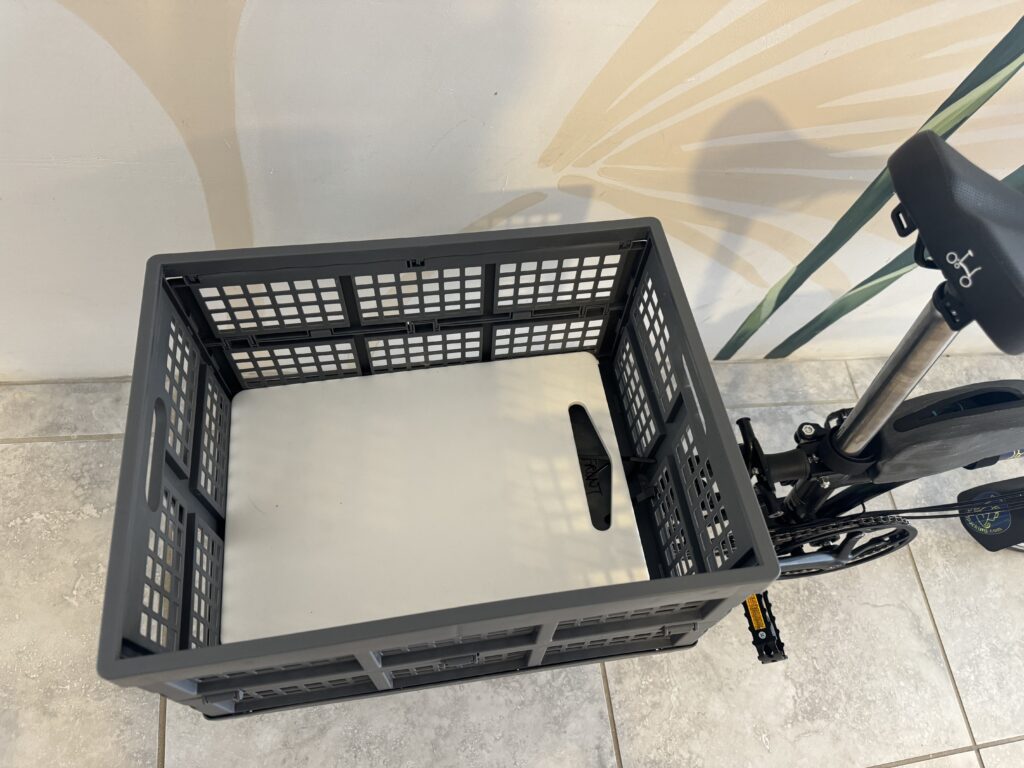
I place a cutting board on the bottom of the dog bike basket to add stiffness, since the basket is both longer and wider than the platform of my bike’s rear rack.
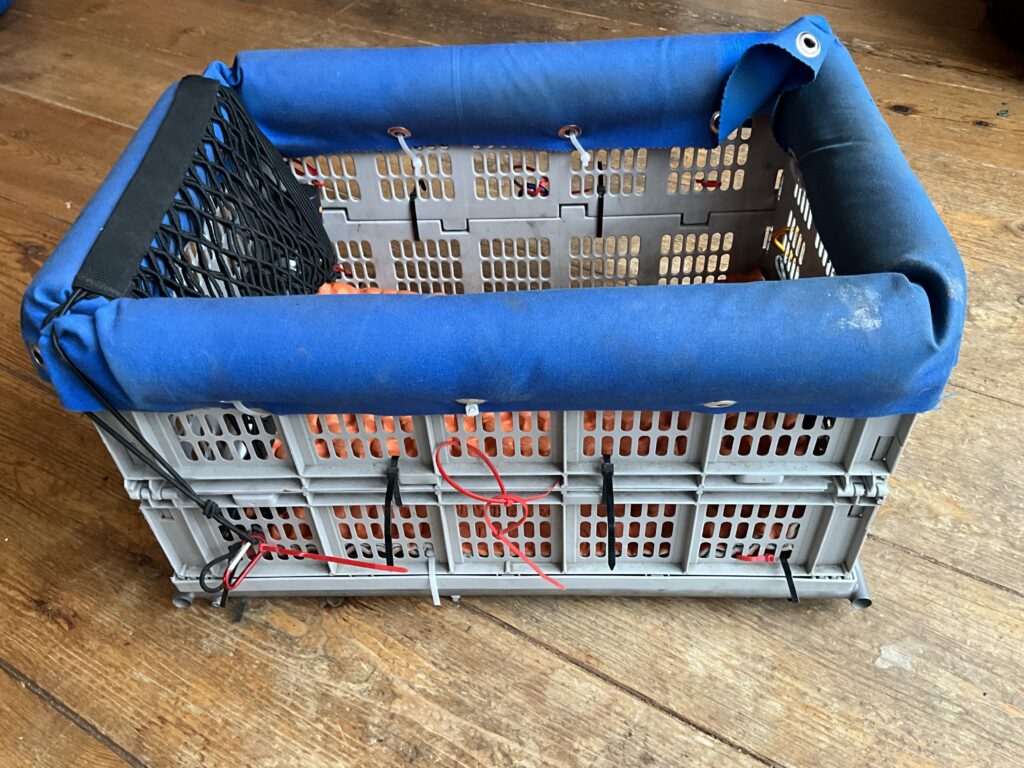
Pool noodles secured with cable ties work well for the rim. When we travel by plane, I remove the noodles from the basket and use them to protect my bike frame. I always carry a handful of spare cable ties to resecure the noodles to the basket and the basket to the rear rack.
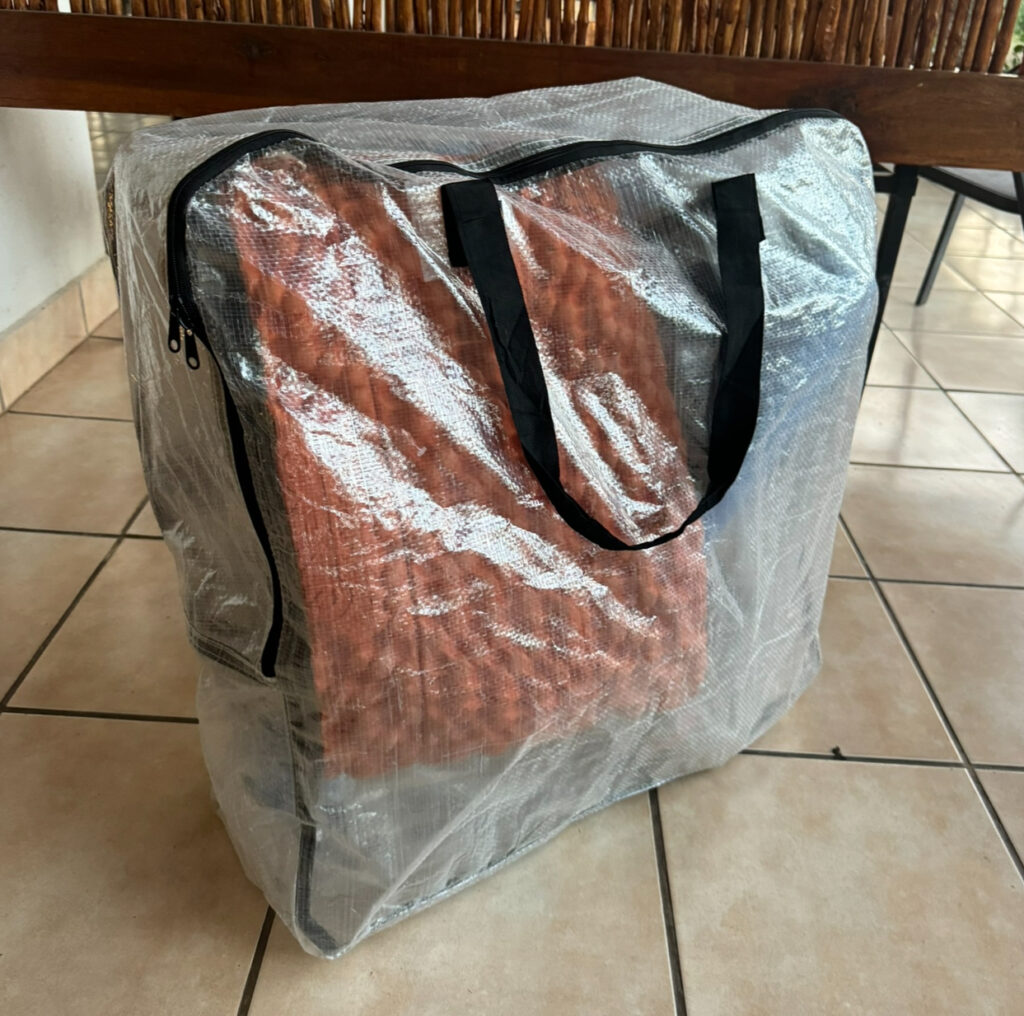
The sleeping pads are also useful for padding the bike during transport and for River to lie on at camp or during rest stops.
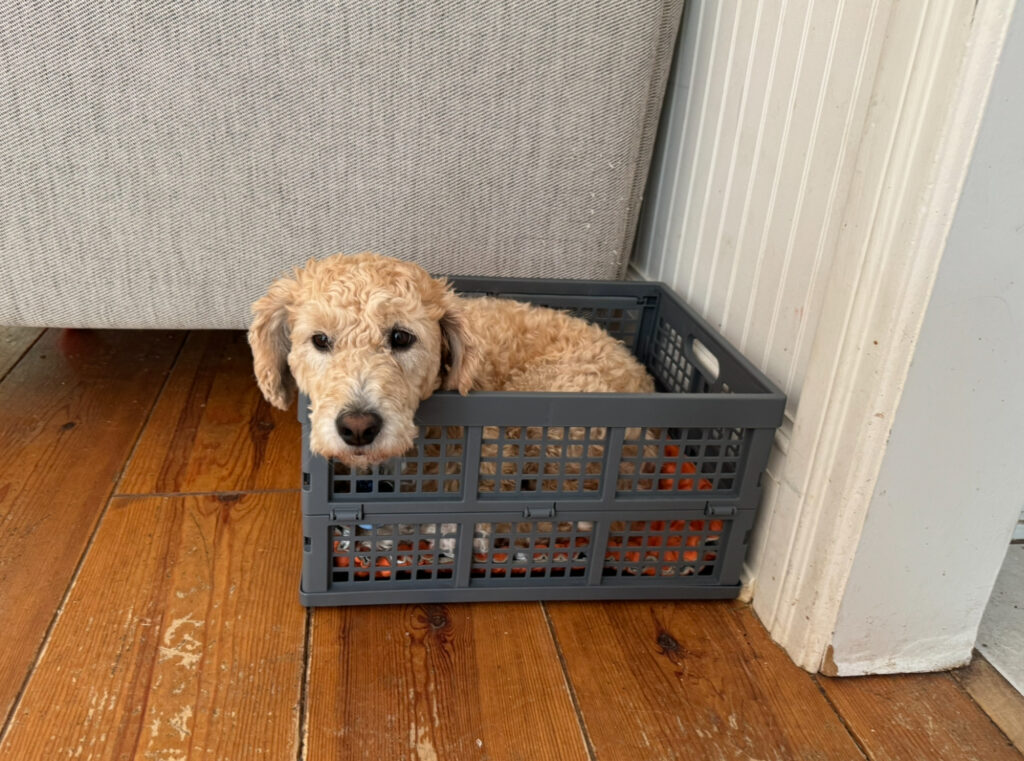
Step 3: Introducing the Bike Basket Indoors
Before putting River on the bike, I let her explore and get used to the bike basket at home. Here’s how I did it:
- I bought two baskets (they are fairly inexpensive)
- Set it on the floor in the living room (ideally on a nonslip rug so it doesn’t shift when a dog gets in or out of it). The living room is where her bed is, so she’s used to lying in that room. If I was tight on space, I would have temporarily swapped her dog bed for the basket.
- Padded the basket (ideally, create the same set-up as will be on the bike)
- Rewarded River for sniffing, stepping in, or lying down in it
The goal is to make the bike basket feel like a safe resting spot. I found it best to let River explore it on her own and I rewarded her with a treat when she did so.
Step 4: Practice “Settle” in the Bike Basket
After a few days I coaxed River to get in the bike basket, and immediately praised and rewarded her with a treat when she got in it and again when she lay down. This step helps create a positive association between the dog bike basket and a feeling of calmness, which is key once a dog is on a bike in motion.
Step 5: Introducing the Bike
After indoor comfort is solid, I mounted the spare basket to my bike using ample and strong cable ties. Then I lifted River up into the basket (jumping came later) while keeping the bike stationary. This let her get used to:
- The feeling of being elevated
- The scent of the bike
- Praising her while in the basket on the bike
I hung out with River on the driveway during this stage—no riding, just positive bike-basket time.
Top tip: If you order two identical bike baskets, you can have one set up on your bike and one in the house.
Step 6: Short, Slow Rides
After several sessions of being stationary in her dog bike basket, I started with short rides in the driveway, keeping speed low and distance short. She was secured to me with a harness and bungee leash.
Step 7: Build Up to the Real Deal
We started with our local park so that she’s land on grass if she decided to jump out. Then we did quiet streets and trails, and gradually increased the length and pace of our rides.
Every dog is different. Some might love basket rides right away, others need time to warm up. The key is to move at your dog’s pace, not yours, and enjoy the time together and the bond it creates.
Related Links
Our YouTube video on Bike Basket Training
River’s collapsible bike basket
About the author
Krista Halling is a veterinarian board-certified with the American College of Veterinary Surgeons and creator of Dogpacking.com. She is also certified in the Human-Animal Bond and in Canine Physical Rehabilitation. Krista loves travelling and adventuring with River, her mini goldendoodle sidekick.


Leave a Reply