By Krista Halling DVM DACVS
Want an easy low-cost DIY camper sofa bed for you and your dog? In this second article of our three-part minivan camper series, we show how we built a sofa bed with minimal cost, experience, and tools.
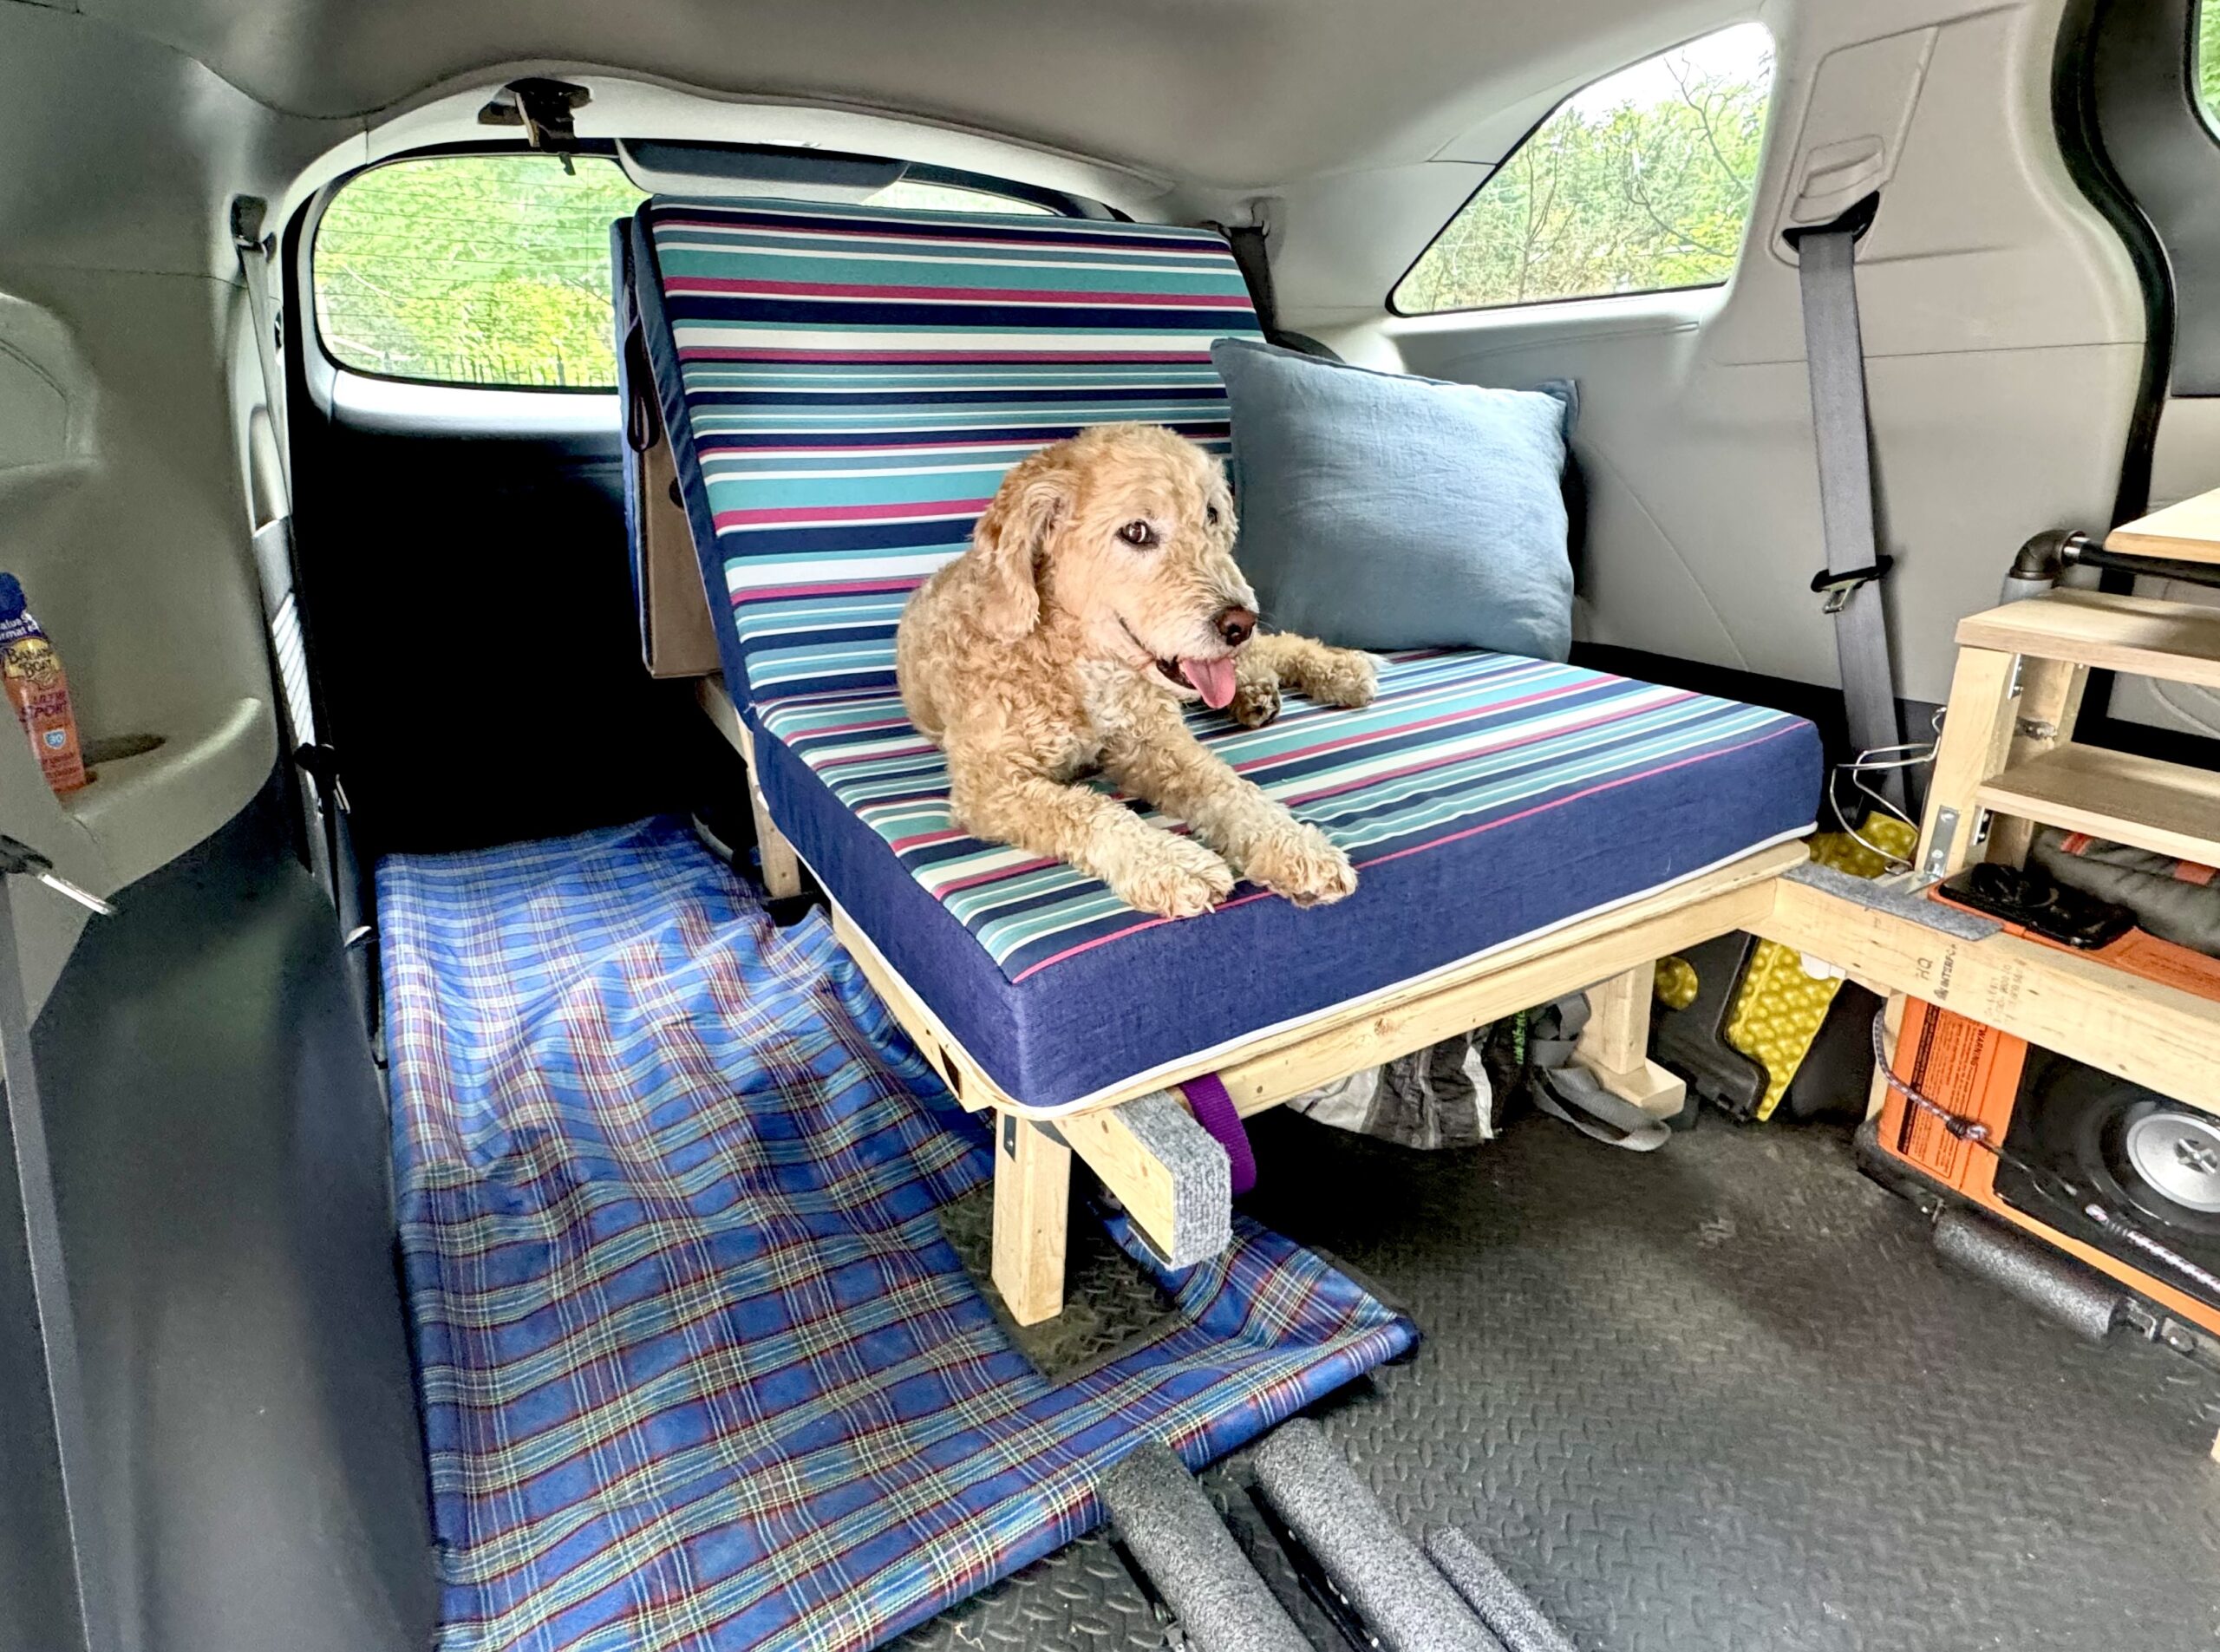
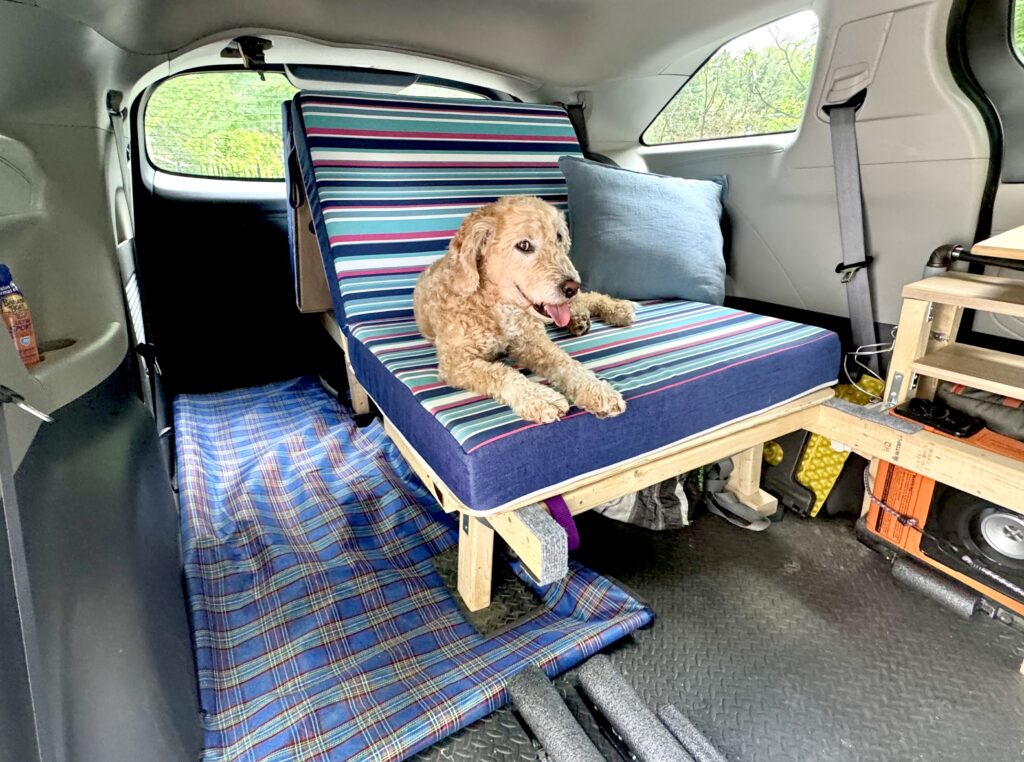
Our goals were to have a sofa bed wide enough for my mini goldendoodle River and I to enjoy, yet narrow enough to allow room for our bike. We adapted the sofa bed design popularized by Eric Loves Earth, creating a hinged sofa bed facing the front of the van. Here’s how we built it:
Tools
- Drill
- Circular or table saw (or building supply store that cuts lumber to spec)
- 2-inch hole drill bit
- Drill bits and drivers for wood screws
- Level (or a good pair of eyes)
- Sandpaper
- Optional: stapler
Supplies
- Mattress ($85); optional: outdoor cushion fabric ($30)
- 4×8 foot plywood (1/2 or 3/4 inch) ($30)
- 2×3 lumber ($8)
- 3-4 piano hinges ($24)
- 4 T-braces ($18)
- Folding leg hinge ($11)
- 2-3 tie-downs ($8)
- Wood screws
- Wood glue
- Optional: indoor/outdoor mat ($2); nylon webbing
1. The mattress
I determined the sweet spot for our width was between 27-32 inches – this would allow a sofa bed configuration and leave a 16-plus-inch passageway for our bike. Wanting to keep the build simple, I went with a 4-inch trifold mattress, measuring 75 inches long by 31 inches wide.
We decided to improve the mattress’s durability by replacing the stock cotton fabric with outdoor cushion fabric and had a local seamstress swap it out.
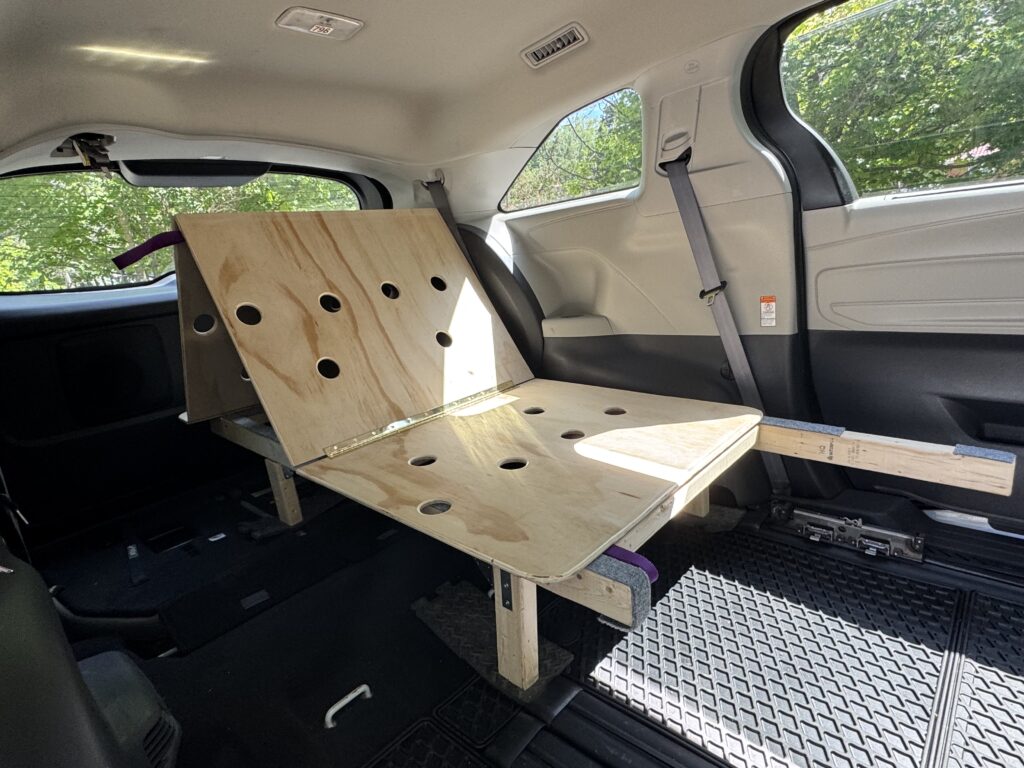
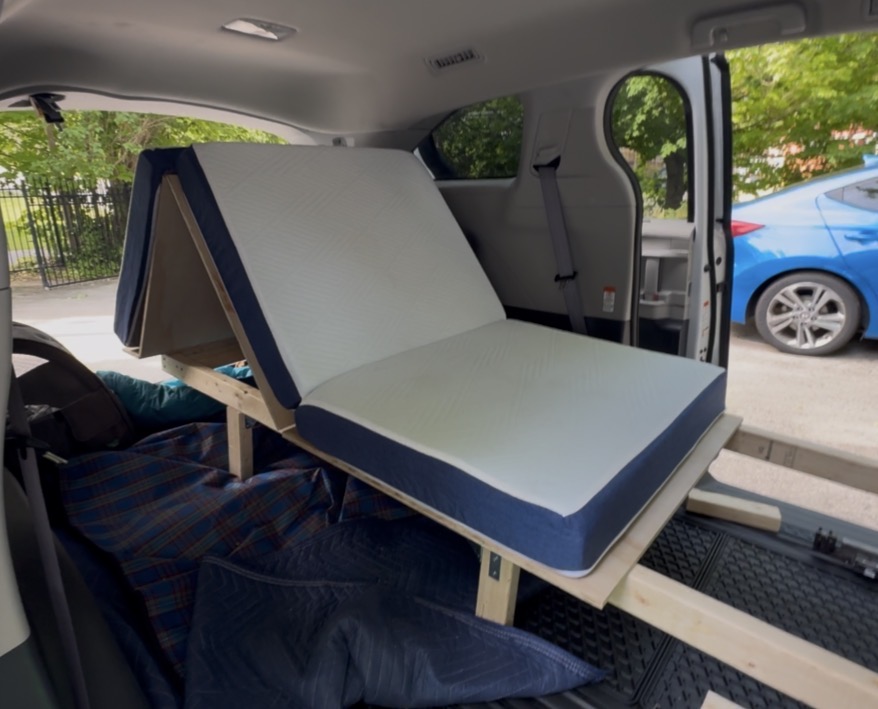
2. The platform
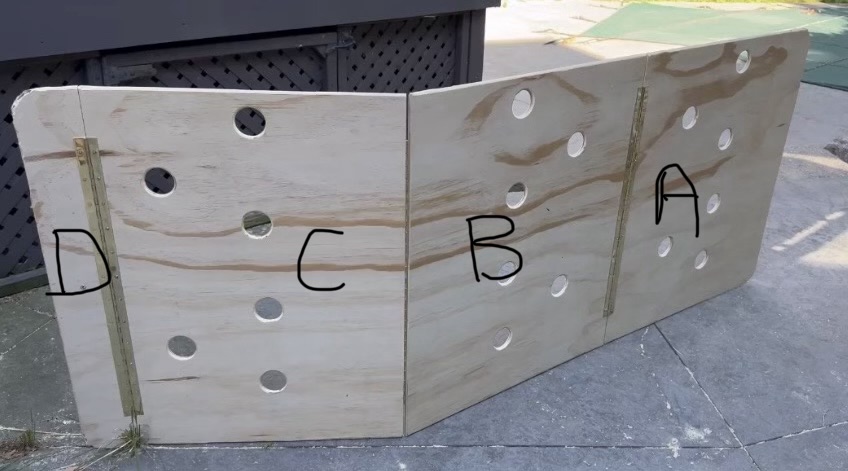
Our sofa bed’s platform is built from four 31-inch wide panels (A, B, C, D) of 1/2 inch plywood:
- Panel A: sofa bed seat; needs to be a bit deeper (27 inches) to accommodate depth of back cushion when in sofa bed mode.
- Panel B: vertical riser for backrest cushion facing front of van; 25 inches deep.
- Panel C: vertical riser facing back of van; 25 inches deep.
- Panel D: hortizontal base attached to underlying frame; this part is fixed to allow the other sections to slide; 4 inches deep.
- (Optional: panel E: seat facing back of van. We omitted this since our bed was already at our mazimum desired length.)
We mocked-up these pieces using cardboard to verify the dimensions before cutting the plywood. At our local building store, we bought a 4×8 ft piece of 1/2 inch plywood and had them cut it lengthwise at 31 inches and the subdivide into 5 pieces (panels A,B,C,D, plus leftover piece).
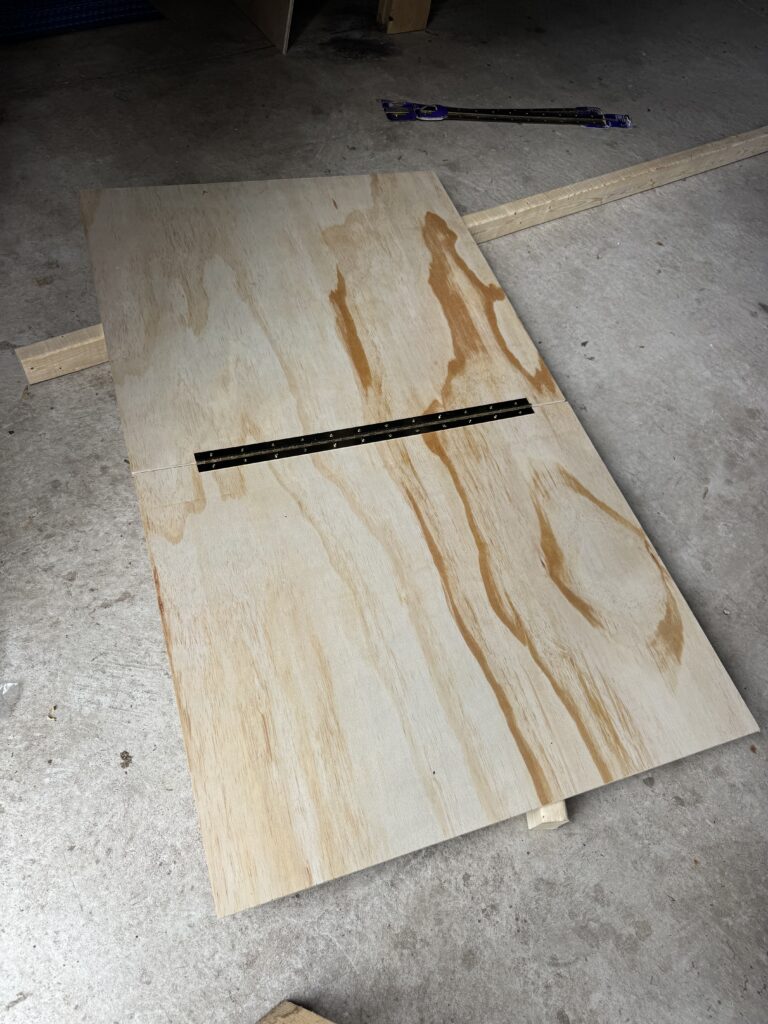
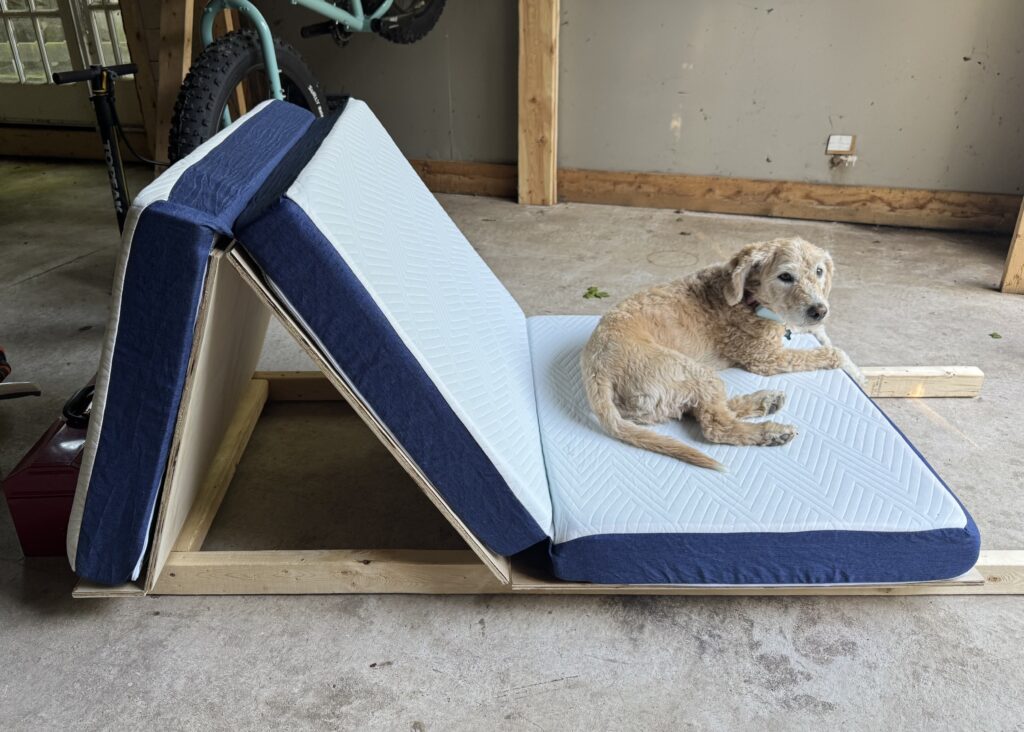
Next we attached the panels using three piano hinges. Note that A-B hinge is on the top surface; B-C hinge is on bottom surface; C-D hinge is on top surface.
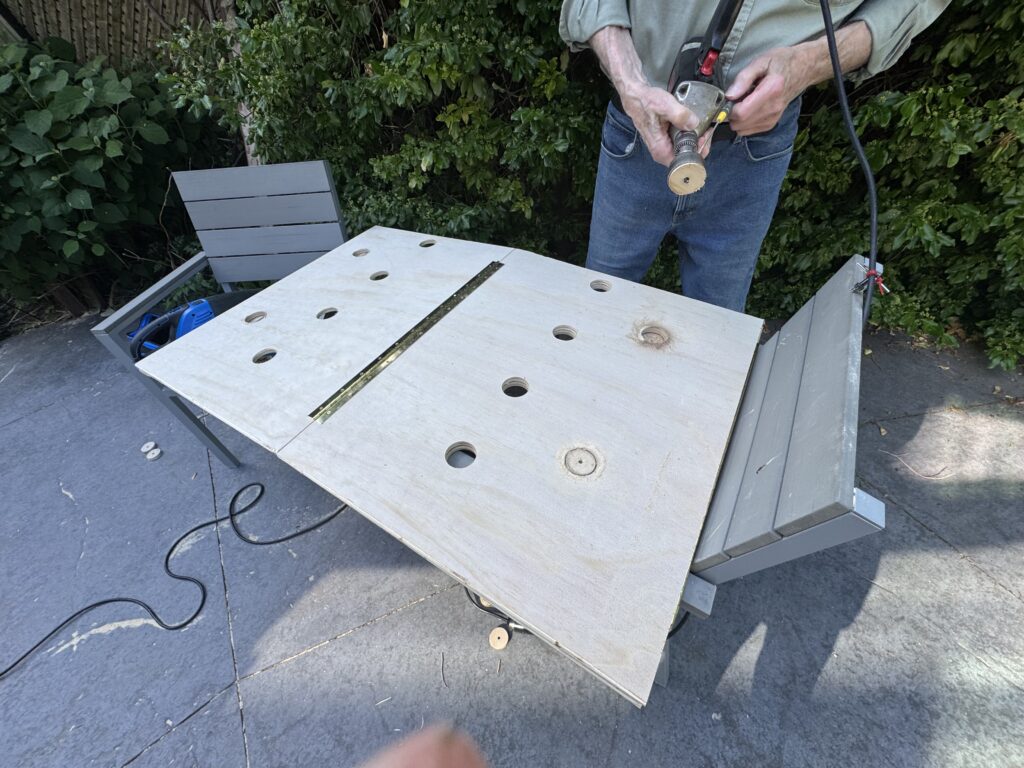
Ventilation
My dad helped me drill 2-inch diameter holes into the platform, allowing ventilation to the underside of the mattress and reducing some of the platform’s weight. We folded the plywood panel, accordion style, and drilled all the way through all the panels such that the holes were in the same position when folded. Now the overlapping holes double as handy carrying handles when the platform is folded.
Sanding
Finally, we sanded all the edges (my dad had a router so that sped it up) so the mattress wouldn’t catch on the wood.
Bed frame
I built the frame using 2×3 lumber. I decided to make the frame footprint the same length as the sofa bed configuration (and 4 inches narrower), so that there wouldn’t be some of the bedframe in the way when it’s in sofa bed mode. In doing so, I’d need to support the right side of the extended panel using a folding leg when in bed mode.
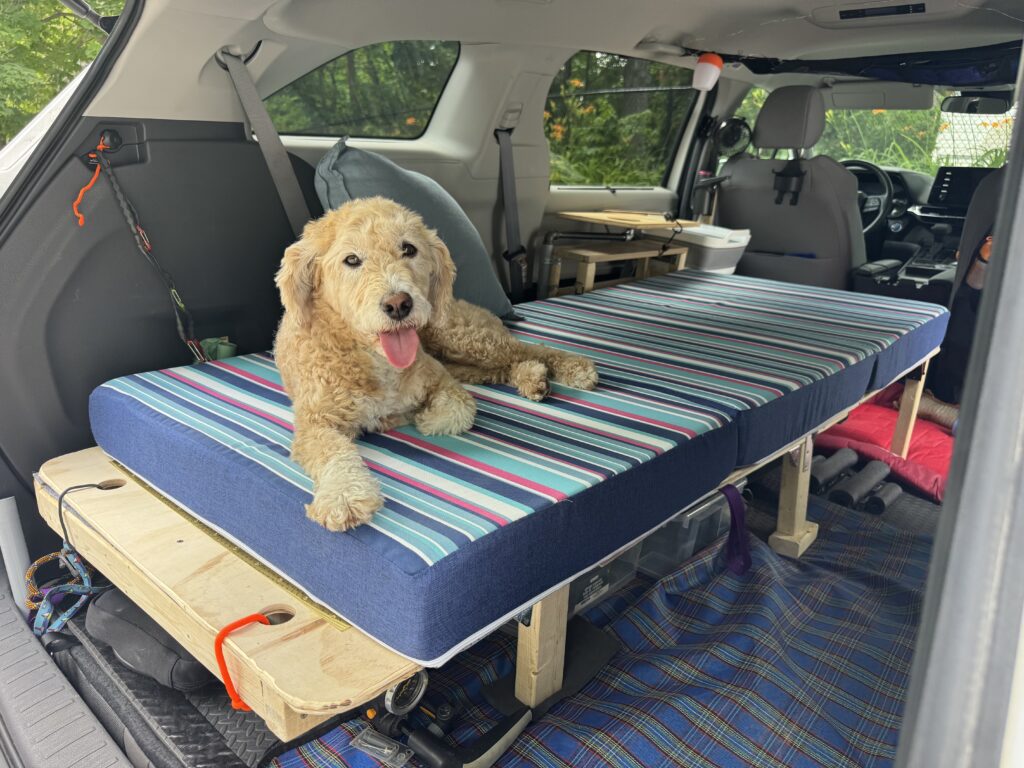
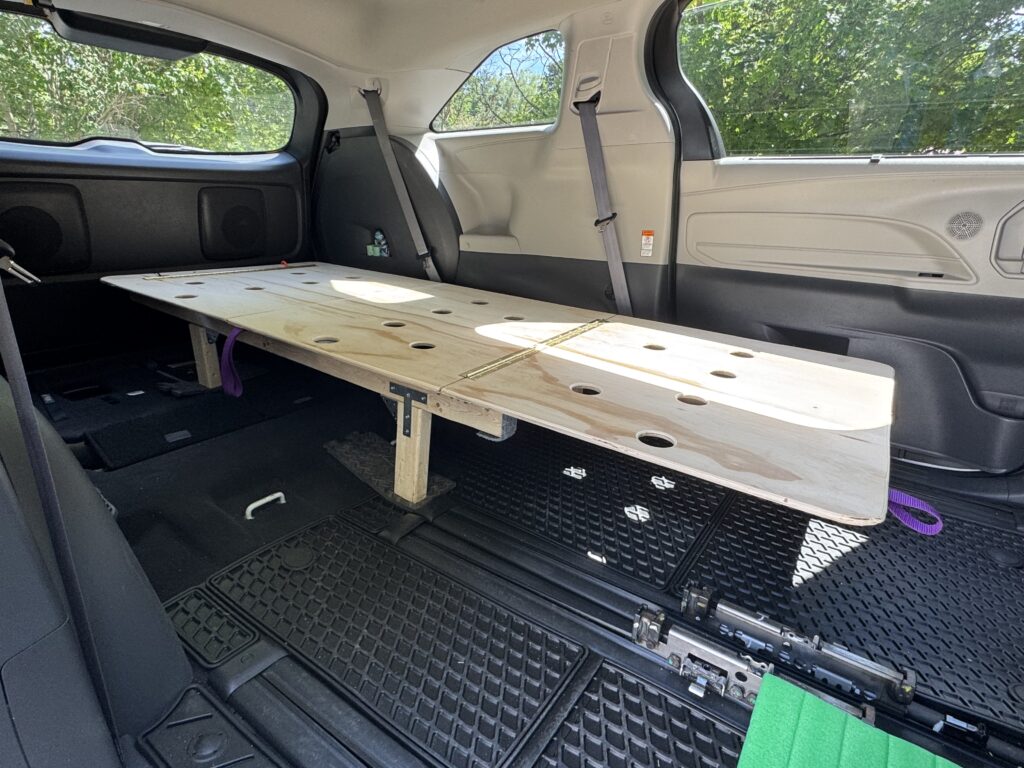
First was the main rectangle: I folded the platform into sofa, bed mode and measured the width and depth of that footprint and then built the rectangle to support it.
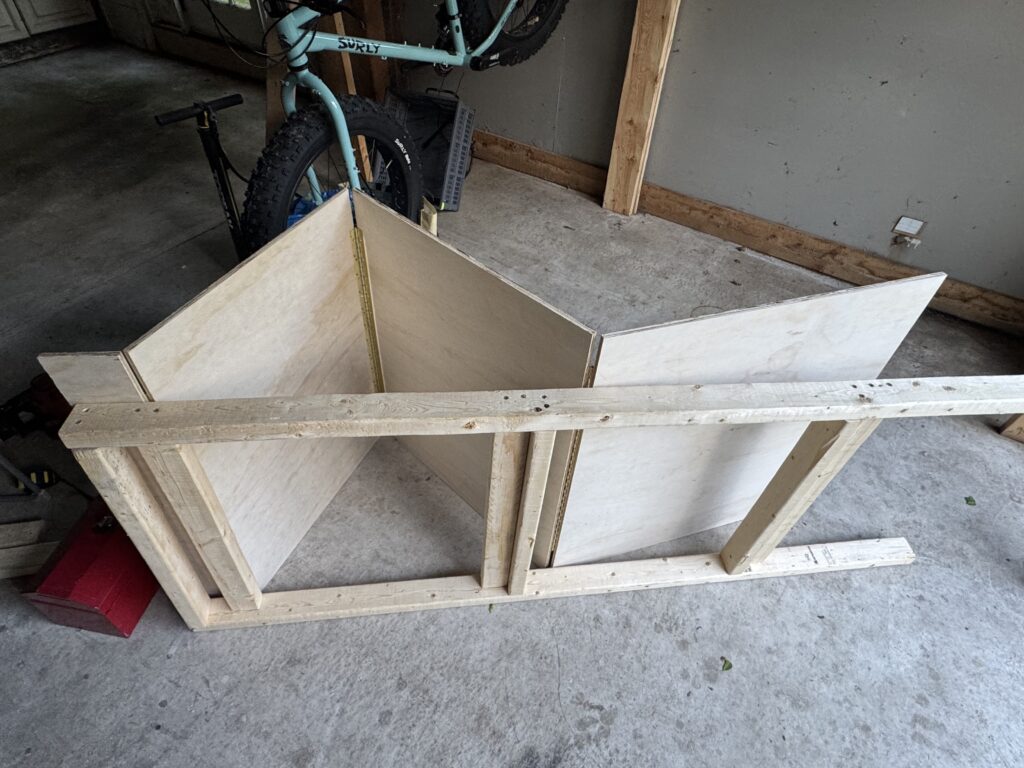
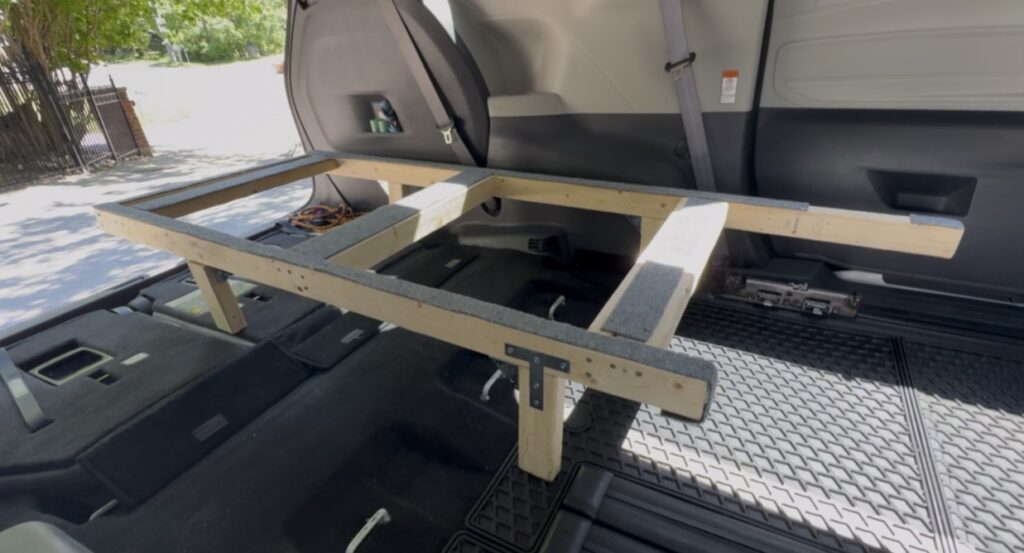
Next are the crossbars: these need to support the hinges, both in sofa bed mode and in bed mode. With the bed platform resting on the underlying rectangular frame, I used a pencil to mark the location of the hinges in sofa, bed mode, and in bed mode and then placed cross bars at those locations.
Legs
I wanted enough height clearance to sit comfortably on the sofa bed when slightly reclined, while trying to preserve some space for under bed storage. To gauge an ideal height, I sat in the van on an inverted bucket and decided that height (13 inches) was pretty good after factoring in the mattress thickness.
In an effort to keep the build simple, I added legs all of the same height, knowing that the front legs would need to be lifted up to compensate for the van’s natural tilt from back to front.
I’m sure the carpenters in the audience will be appalled by this, but in keeping it simple, I just inserted the frame, platform, and mattress in the camper van and then raised the front with shims until it looked level and then measured the resulting leg length. Good enough in my books. That gave me the final length of the front legs.
Fortunately the Sienna has a two-tone interior so I could compare the bed platform to the horizontal line of the car interior. As a final step, the legs will all be secured using T-braces.
Folding leg
The 2×2 leg on the right side folds away when in sofa mode. This is easy to make using a folding leg hinge, as long as you’ve allowed 2+ inches of clearance between the edge of the platform and the bed frame.
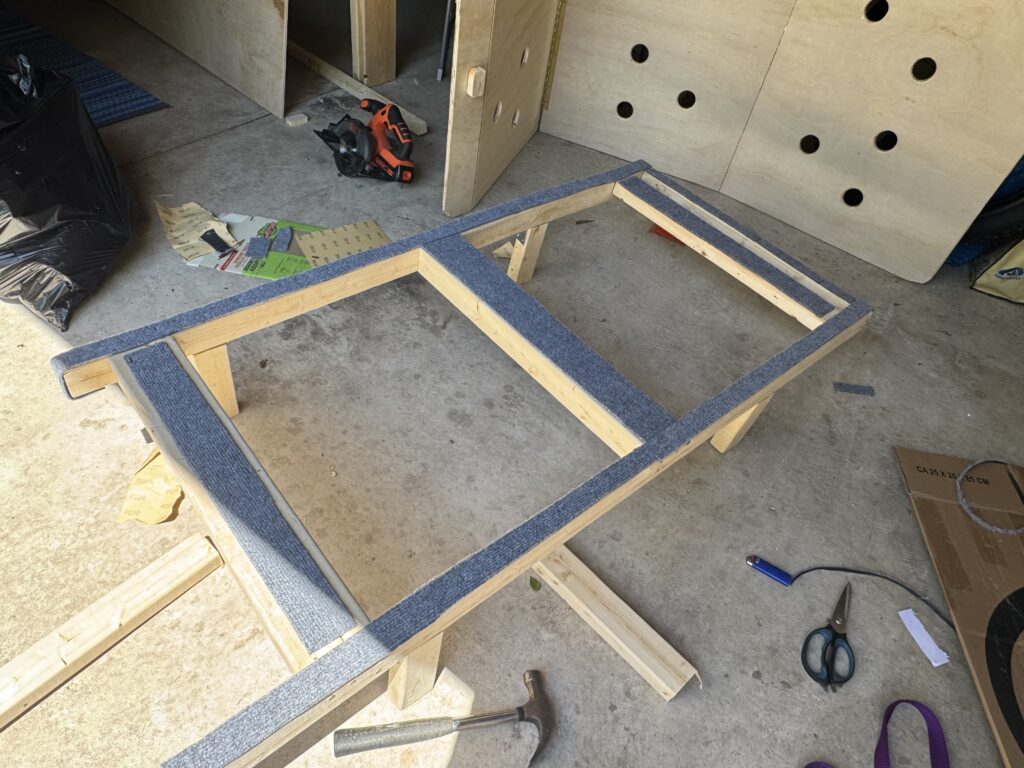
Carpet
To soften the impact of the platform on the frame when converting from sofa bed to bed, I covered the top of the bed frame with strips of carpeting using an indoor/outdoor mat from the dollar store.
Wooden stopper
To secure the platform when it’s in sofa bed mode and preventing it from sliding back into flat bed mode, I screwed a 1×2 inch piece of half-inch plywood to the bottom of platform piece A, immediately behind the foremost crossbars.
To stabilize panel D, I’ve used rubber-coated twist ties. If you want a more permanent solution, you could screw panel D to the underlying frame.
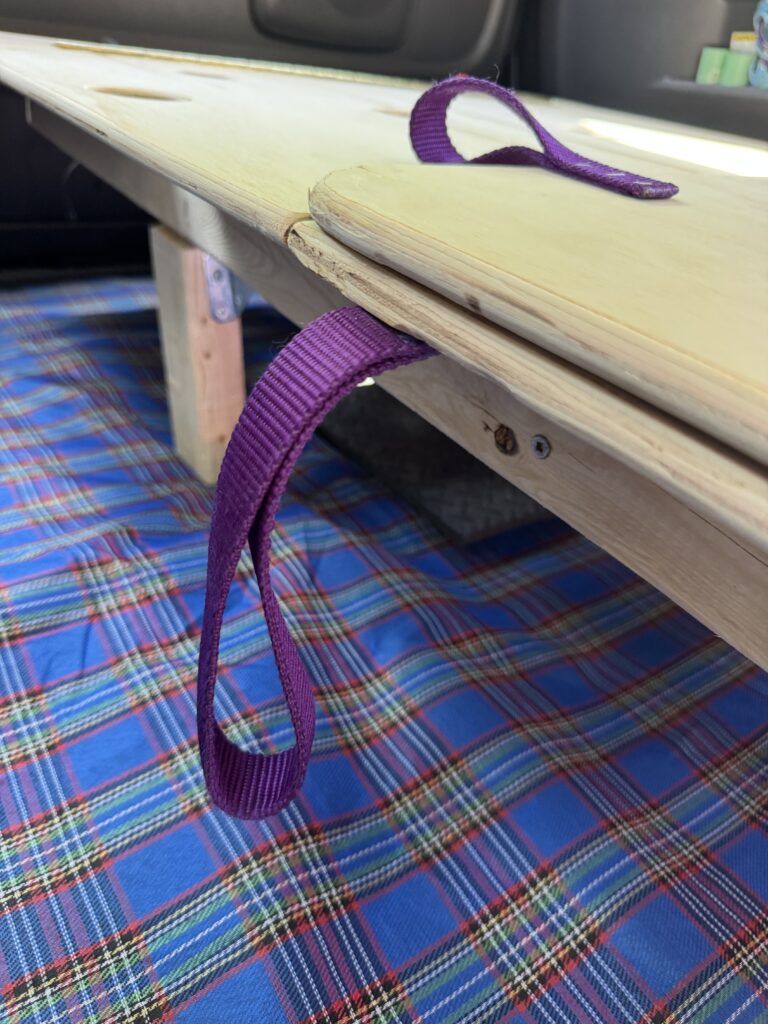
3. Nylon pull straps
My parents donated the leash from their late dog, so I used it to make a strap on panel B near the B-C hinge and on panel A at the foot of the bed. By stapling nylon webbing at these locations, it facilitates converting the bed between sofa and bed mode. And the memory of my parents dog will join River and me on our adventures.
4. Tie downs
To prevent the bed from shifting while driving, we anchored the bed frame using nylon tie-downs to seat anchors in the floor of the car.
Additional points:
- If using a level, make sure your car itself is also level
- Decide whether you want your sofa bed to face the front, rear, or both directions. That will determine whether you use 4 vs 5 panels, and in which direction you install the bed.
- For your bed height, decide whether head room or underbed storage is more important; in minivans it’s hard to have both
- Mattress thickness: this is part of your bed height so think twice before ordering the plush 6-inch deal
- An alternative to a trifold mattress are Individual cushions made from a cut-up memory foam mattress
- A handy throw cushion idea is to fill a cushion cover with puffys (insulated jackets) guess the and other warm clothes. It saves on storage while giving you a comfy cushion
Related reading: Part 1 of the series: Building a DIY Dogpacking Campervan in a Toyota Sienna
We hope you’ve been inspired by this article. Stayed tuned for our next article describing our kitchen and storage set-up.
What aspects of this sofa bed build do you like the most? Drop your thoughts in the comments below.
About the author
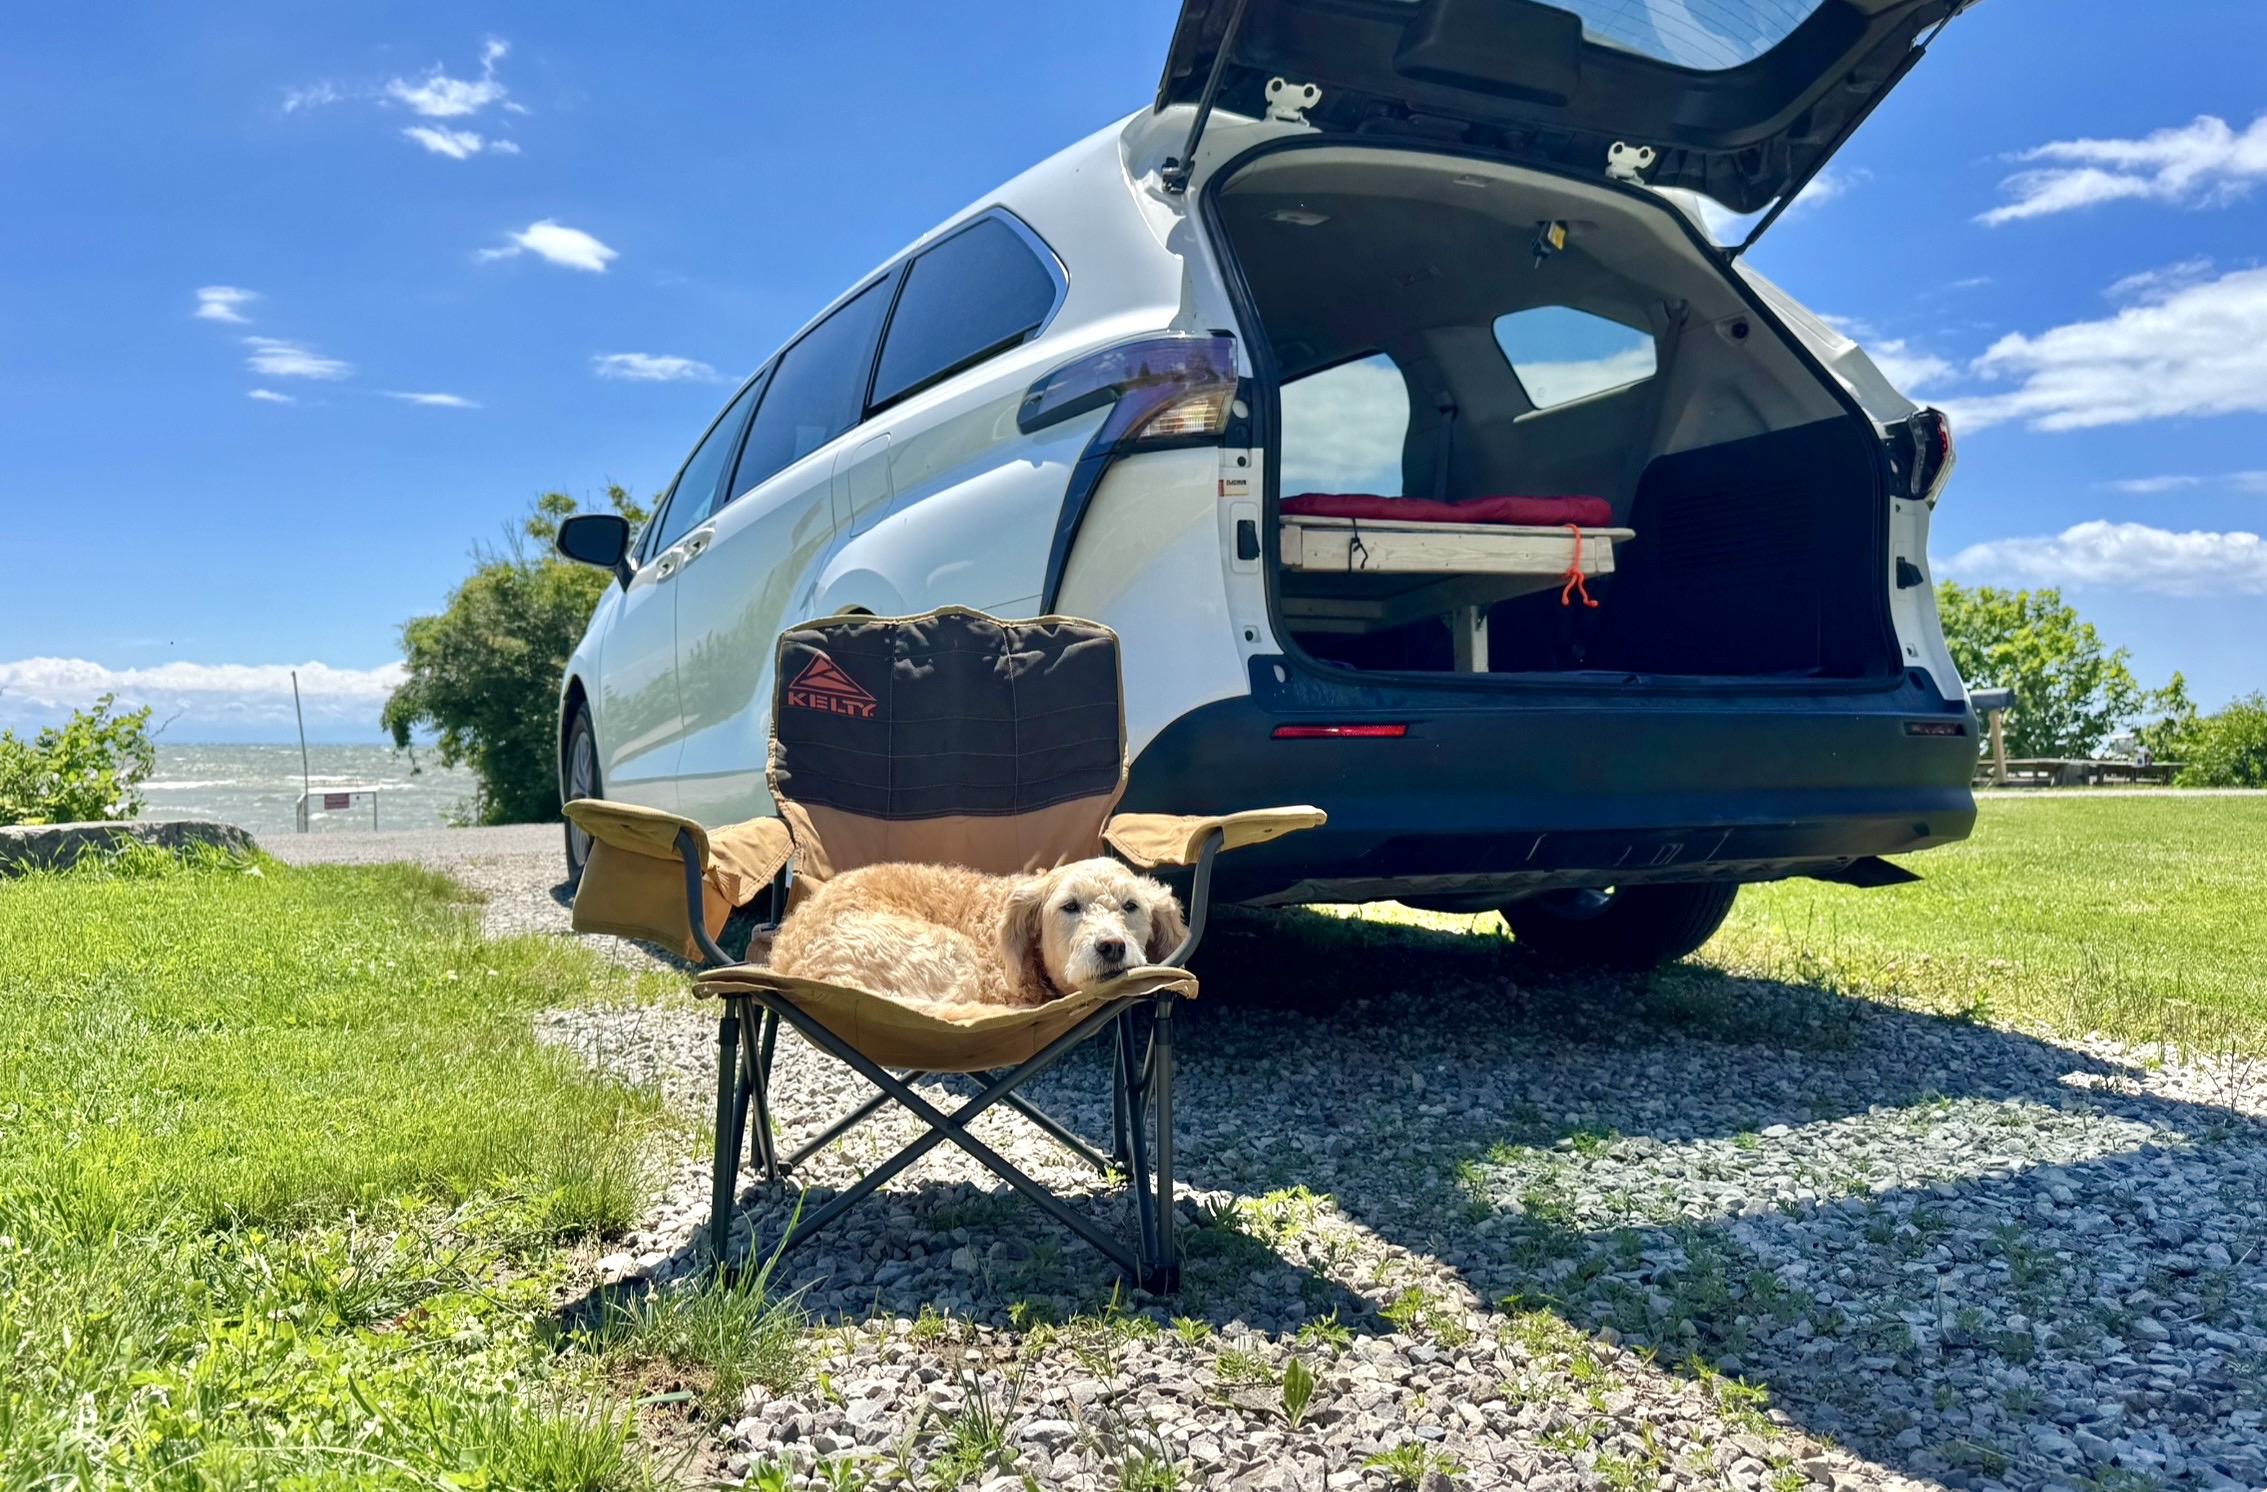
Krista Halling is a veterinarian board-certified with the American College of Veterinary Surgeons and creator of Dogpacking.com. She is also certified in the Human-Animal Bond and in Canine Physical Rehabilitation. Krista loves travelling and adventuring with River, her mini goldendoodle sidekick.


Leave a Reply